vmo wrote:Thanks to Maffc for the bones and some improvements

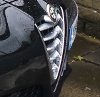
I exported the model, but I had the "classic" problem: a big and ugly pink box over the car.
How can I fix this issue?
Coming soon, I will release the coupé to steam.
The game maps it's materials across to those of the model's, unfortunately 3ds Max likes to shuffle these so the mappings are not consistent. To get round this the Devs have put a section in the LUA file that looks similar to this
Materials = {
"ECS_BODY", --Middle
"ECS_BODY", --Front
"ECS_BODY", --Rear
"ECS_PLASTIC",
"ECS_CHROME",
"ECS_BODY", --Other body Paint
"ECS_GLASS",
"ECS_SEAM", --Middle
"ECS_SEAM", --Rear Seam
"ECS_CARGO",
"ECS_CARGO_REAR",
"ECS_BOTTOM_BOX",
"ECS_TOP_BOX",
"ECS_SEAM", --Front
"ECS_TRANSPARENT",
},
This tells automation that for this model the 1st material in the file is Body Paint, as is the 2nd and 3rd, the 4th is "Plastic", etc. Bright Pink boxes (or other body parts) are normally an indication that a material mapping is not found. (In your case I suspect you are missing entries for the top and bottom body boxes - see above)
You need to amend the LUA file so that the mappings match. The "easiest way" to do this is this.
- set your 1st material to "ESC_NOTFOUND" (this will force the material to be pink)
- save the LUA
- load your model in Automation and look for the new pink bit
- change the "NOTFOUND" entry in the LUA to be the correct value
- repeat with the next material in the list.
The above LUA extract has all the current material mapping values for bodies. I also add comments to show which section of body or seam that material belongs to, we will return to that later. In between each cycle all you need is change the year in car designer and re-click on the body. The new mappings will be applied and the pink bit should move.
Once all the mappings are correct we need to move further down the LUA to this section
ProjectionMaterials = {
Front = 2,
Middle = 1,
Rear = 3
},
This tells Automation which bit of body paint is what section of the car, this is why we make comments in the main list. Count down the list till you find the front body paint and put that number into the Front = section, repeat for Middle and Rear. Other body paint does not need to be assigned here.
Repate the process again for the following section of the LUA file, only this time we are looking for Seam materials
ProjectionSeamMaterials = {
Front = 14,
Middle = 8,
Rear = 9
},
Once this is done the correct materials will be assigned within game, fixutres can be added to the correct areas of the car and, providing the UV mapping is OK, no unexpected holes should appear.